OS MasterMap Topography Layer is the most detailed and accurate view of Great Britain’s landscape – from roads to fields, to buildings and trees, fences, paths and more. It contains over 470,000,000 topographic identifiers (TOIDs) providing the user with a unparalleled view of Great Britain. With this sheer volume of detail comes ALOT of data and this post will explore two tools for uploading the whole dataset into PostgreSQL.
The product normally comes on a set of CD-ROMs (11 for the whole dataset) and it is essential that you get hold of the Feature validation Dataset (FVDS) which provides a list of all the TOID’s so you can cross reference with what has been uploaded.
I have also created a layer that contains 1x1km grid squares that have OS MasterMap topography data (244,583 in total) by using a combination of this free tool and the OS 1km price matrix. This is useful as a reference to check you have the data everywhere you should do and also if you need to use the grid squares as a search mechanism for the data.
You can download this layer from here.
Developed by Lutra consulting and available as a QGIS plugin, this tool provides a simple GUI for uploading data. It allows data to be uploaded with styles and provides postgres setup details to optimise the speed of upload. The downside is that the tool only supports create or replace (not APPEND) which implies COUs might not load consistently.
To use you need to be connected to your postgres database through the QGIS DB manager. You are presented with a variety of options: you will definitely want to create a spatial index and remove duplicates because we are dealing with geographic chunks of data. The last two options relate to styling the layer and it is recommended to select these aswell. Two additional fields will be added allowing you to style the layer with either ESRI, Geoserver or QGIS stylesheets. In the right window you can also select the fields you want to be entered – the less you select the quicker the upload but at the cost of losing data.

I had one issue with the styling and had to add these fields after the initial upload. I believe this was to do with the svg path not being correct (as mentioned here. If you experience the same issues then just download the SQL scripts for schema 7 here and schema 9 here. Note, you will need the array SQl scripts as items under the styling columns are stored in array’s.
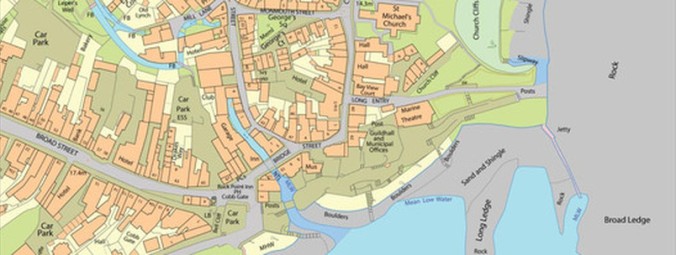
You can see the visual difference between schema 7 (bottom) and schema 9 (top) below:

The Astun loader has one significant advantage (it can append records meaning COUs can be handled) and one significant disadvantage (it’s alot slower) than the OS translator. Therefore, you could use the OS translator to get the whole dataset in PostgreSQL and then use Astun to handle the COU’s for example.
This tool allows GML/KML data in general (OS Mastermap is GML) to be transferred to any format compatible with OGR – in this case we will transfer the data into PostgreSQL. To be this we need to create a config file, some examples are provided here. The one I used is presented below:
# Note: Environment variables can be used with any of
# the options by using a token of the form:
# $HOME, ${HOME} or %TEMP% (Windows only)
# The directory containing your source files.
# All supported files in the specified directory and
# it's descendants will be loaded.
src_dir=/home/brainnwave_nathan/Desktop/hp/2255669-HP4500-5c11.gz
# The directory used to store the translated data
# if writing to a file based format such as ESRI
# Shape, MapInfo TAB etc.
out_dir=/home/brainnwave_nathan/Desktop/Output
# The directory used to store temporary working files
# during loading.
tmp_dir=/home/brainnwave_nathan/Desktop/temp
# The ogr2ogr command that will be used to load the data.
# Here you can specify the destination format and any
# associated settings (for example database connection
# details if you are writing to PostGIS).
# As well as environment variables the following tokens can
# be used which will be substituted at runtime:
# $output_dir - the directory specified by the out_dir setting
# $base_file_name - the file name of the file to be loaded
# $file_path - the full path of the file to be loaded
ogr_cmd=ogr2ogr --config GML_EXPOSE_FID NO -append -skipfailures -f PostgreSQL PG:'dbname=brainnwave active_schema=public host=12.34.56.78 user=postgres password=abcdefghij' $file_path
# The command used to prepare the source
# data so it is suitable for loading with OGR. Choose a prep
# class appropriate for your data, for Ordnance Survey
# products take a look at prep_osgml.py for the available classes.
prep_cmd=python prepgml4ogr.py $file_path prep_osgml.prep_osmm_topo
# An optional command to be run once OGR has created it's output.
# Called once per file, useful for loading SQL dump files etc.
# All of the tokens available to the ogr_cmd can be used here.
post_cmd=
# Optional OGR .gfs file used to define the
# feature attributes and geometry type of
# the features read from the GML.
gfs_file=../gfs/osmm_topo_postgres.gfs
# Whether to output debug messages and keep
# temporary files (True or False).
debug=True
Once the data is loaded, the SQL scripts to append style fields still have to be run to allow the use of stylesheets.
